Wednesday, March 22, 2017

Crochet Chunky c2c Blanket


I have been wanting to make a c2c blanket for some time now. I have so many things on my to-do list that I never got around to it. Recently, I went to the Michael's and they had a yarn sale on the Loops & Threads Charisma yarn. I bought enough to make a small blanket.


It was a fairly quick project and I love how it turned out. I can imagine using super bulky yarn for an even cozier blanket (add that to my to-do list too!). hehe

I decided to add a plain border. I used two rounds of double crochets and wanted to add a finish. I did a quick search and fell in love with the twisted-cord look of the crab stitch which is doing a single crochet in reverse.

I'm so glad I decided on the crab stitch because it was just the final touch the blanket needed!


Supplies:

6 skeins of Bulky Yarn | Loops & Threads, Charisma | 4 skeins for c2c, 2 skeins for border
8mm Crochet hook (recommended by this yarn)
Tapestry Needle
Scissors

Abbreviation:

ch - chain
sl st - slip stitch
st(s) - stitch(es)
sc - single crochet
dc - double crochet


Special Stitch: Crab Stitch - Single crochet in the next stitch to the right of work (instead of traditional left stitch).

Video Tutorial available at the bottom and on YouTube.

c2c:

Row 1: ch6, 1 dc into the 4th ch from hook and into the next 2 ch sts (first corner block)

Row 2: turn work, ch6, 1 dc into the 4th ch from hook and into the next 2 ch sts (first block), sl st in the space between last two posts in the next block. ch3, 3dc into the same space as the ch sts (2nd block).

Row 3: turn work, ch6, 1 dc into the 4th ch from hook and into the next 2 ch sts, *sl st in the space between last two posts in the next block. ch3, 3dc into the same space as the ch sts. Repeat from star to the end.

Repeat Row 3 until you decide you want to start decreasing the other side. I used 2 skeins and then decreased with 2 skeins. (the other 2 skeins are for the border)

Decrease Repeat Rows: sl st into the space between each dc posts 3x. *ch3, 3dc into the same space as the ch sts. sl st in the space between the last two posts in the next block. Repeat from star to the end. Repeat until you sl st into the last block. Do not create a "stepping block". After you sl st to the last block , turn your work. 

Repeat until you complete the last block on the opposite end of blanket.

Border:

(change yarn color if desired)

NOTES: Attach yarn anywhere (if you change colors otherwise start where you ended your last block). When you are crocheting into the side of the dc blocks, make TWO sc sts in this block. If you are crocheting to the top of the dc sts, make THREE sc sts in this block.  


Round 1: ch1, *1sc in each st until you reach corner, (1sc, ch1, 1sc) into a corner st, Repeat from * around. sl st to the first sc.

Round 2-3: ch3 (counts as a dc), *1dc into each st until you reach the ch1 space in corner, (2dc, ch1, 2dc) into the ch1 sp, Repeat from * around. sl st to the 3rd ch at the beginning.

Round 4: ch1, 1sc into the st on the RIGHT. Continue with 1 sc into each st to the right including the ch1 spaces in corner. sl st to the first ch1 st. 

Fasten off and weave in all ends. Stand back and admire your work and while you're at it, give yourself a round of applause too! :D


Video Tutorial


For other Handmade by Phanessa patterns, visit my shops:

Etsy         Ravelry          Craftsy        Knit Picks

You may sell products using ©Handmade by Phanessa Patterns, but please give credit and link back to the patterns. Do NOT use any of my photos or copy/distribute any of my patterns as your own. If you share my free patterns, please link back to original pattern page. Please send me a message if there are errors to any of my patterns to handmadebyphanessa@gmail.com. Thank you!

© 2017 Handmade by Phanessa, All rights reserved. 

Tuesday, March 21, 2017

Crochet Newborn Beanie with Bow


I'm addicted to crochet and knitting (that's not a surprise). I have to do one or the other all the time. So I decided to make this quick & easy baby beanie. I thought about adding a pom but I decided to make a cute little bow instead.

Supplies:

Worsted Weight Yarn - in 2 colors 
6mm Crochet Hook
Tapestry Needle
Scissors
Tape Measure

Abbreviation:

ch - chain
sl st - slip stithc
st(s) - stitch(es)
sc - single crochet
dc - double crochet

PATTERN (beginning chain does not count as a chain stitch):

Round 1 - Start with a magic ring OR ch4, sl st to the first ch to form a circle.
ch2, 12dc into ring/circle. sl st to the beginning dc (12 sts)

Round 2 (increase) - ch2, 2 dc into same st, 2 dc into each st around. sl st to the beginning dc (24 sts)

Round 3 (increase) - ch2, 1 dc into same st, *2 dc into next st, 1 dc into next st. Repeat from * around ending with 2 dc in last st. sl st to the beginning dc (36 sts). It should now measure 4"-4.25"


Round 4-7 - ch2, 1 dc into same st, 1 dc into each st around. sl st to the beginning dc (36 sts)

Round 8-10 (switch color) - ch1, 1 sc into same st. 1 sc into each st around. do not sl st to beginning sc. Start next round by doing a sc into the beginning sc and work in a continuous round for a total of 3 rounds. You may use a stitch marker to mark the the beginning of the round. sl st in last st at the end of round 10.

Weave in all ends.

BOW: The bow is adjustable. Make it as long and wide as you'd like. 

Row 1 - ch as many chains as you need for the length of the bow. sc into the 2nd ch from the hook and in every st until the end. ch1 & turn.

Row 2 - 1 sc into each st across. ch1 & turn.

Row 3 - 1 sc into each st across. 

Trim - ch1 1 sc all the way around the edge of the bow. sl st to the top of the first sc.

Wrap yarn around middle (as thick & tight/loose as you want). Tie in the back of bow leaving a tail for sewing. Using a tapestry needle, attach bow to beanie.


Thursday, February 9, 2017

Crochet Mermaid Blanket

This is not a pattern. I do not have a pattern for this yet. I do have other patterns available on Etsy, Ravelry, Knit Picks & Craftsy


I wanted to make a mermaid blanket as a gift for a little girl turning 5. I have never made a mermaid blanket and have had no desire to make one. A little history: I get discouraged when a project takes too long. I'm very content with making hats and scarfs/cowls. I've had several big projects that I've never completed and some I did actually finish pushing myself not to give up. 

This blanket wasn't too bad. I pretty much spent every free time I had at home working on it. I doubled up on worsted weight yarn and used a 9mm hook. I went to my ever-growing stash and picked a few colors I thought would work and that I had enough colors of. 


I went straight to Pinterest and found several free patterns but I knew that following a pattern would only slow me down because i'd want it to be perfect and follow the pattern exactly. So after looking at a few, I decided to go with easy stitches and just wing it. 


Since I only have so much of each of the skein of colors I found in my stash, I had to make this a two two tone blanket. While searching for a pattern, I noticed that some blankets were completely covered all the way to the top while some were only closed in the back part way up. I thought if I were using it, I wouldn't want to fight with getting into an enclosed blanket while curled up on the couch. I'd want to be able to stick my feet in and just cover the rest of me. So that's what I did!

After making the body, I went back to the top and added a different color in shell stitches.


I kept worrying that it was too small so I kept going and going.... It ended up being a little big but hey, that means she can grow into it right? 

I completed the tail last. Most everything (not including the shell stitches) are worked into the back loops only giving it a nice ribbing texture.


Monday, January 30, 2017

Crochet Jumbo Cowl


This yarn. I love it. It's so thick and chunky but I found that it was hard to figure out what to make with it. I made a partial blanket and it got waaaay too heavy. At least my son had fun "helping".


So..... I frogged it.


And made a cowl.


Its pretty simple to make since the yarn is HUGE and the hook is 25mm. It took me less than 30 minutes!

Materials:

Loops & Thread "Chunky Grande" yarn (1-2 skeins)
25mm Crochet Hook
Scissors
Large stitch marker (optional)

Pattern:

Starting with a slip knot, 
Chain as long as you want for the circumference you want. I chained 17.

Join the chain by doing a slip stitch to the first chain (careful not to twist stitches). 
Chain 1, 1 single crochet into each stitch all the way around (do not slip stitch to join the round)

Note: The rest of the cowl is crocheted in a continuous round and in the back loops only. If needed, place a marker at the beginning of the round.

Go straight into the first single crochet but crocheting into the back loops only. Continue crocheting 1 single crochet into the back loops only of each stitch until desired height is reached, slip stitch to the last stitch at the end of the last round. 

The yarn was large enough that I use my hands/fingers to weave in ends.

I just love the beauty of the stitches when crocheted into the back loops.


Saturday, January 21, 2017

Crochet Becks Chunky Scarf


I love wearing scarfs but when someone asked me if I could make one of those wrap around the neck chunky scarfs with buttons, I thought "How come I haven't made many scarfs this season?". I'll tell you why... I made so many in the past that I have so many to wear daily! Also, I opened my Etsy shop, Handmade by Phanessa in August and have been crazy busy designing hats and cowls (my other favorite neck warmer) that I just haven't made many regular scarfs. This scarf, along with many projects, are on my to-do list! At least I can cross this one off my list!

I hope you enjoy this quick & easy project that will keep you nice and cozy all winter long! This project uses just under 3 skeins of Super Bulky yarn & a 9mm crochet hook so it really works up quickly. Worked in the back loops only, it creates a beautiful ribbing texture. The end results is a chunky, extra squishy, extra cozy scarf!

Supplies:

3 Skeins of Super Bulky Yarn - Lion Brand Hometown USA, Peacock
9mm Crochet Hook
Yarn Needle
3 large buttons - I used 2" coconut buttons

Abbreviations:

ch - Chain
sl st - Slip Stitch
dc - Double Crochet
st(s) - Stitch(es)

PATTERN 

Finished Measurements: 39" long | 10" wide

Pattern Notes: The beginning chain 2 does not count as a double crochet. The foundation is worked into the "humps" of the chain to create a prettier edge. The scarf is worked into the back loops only. To change/add new skein of yarn, do not complete the last step of the double crochet. With 2 loops on the hook, yarn over with the new yarn and pull through the 2 loops. Tie a double knot using the 2 tails from the different skeins.

Start with a slip knot. 
  • Foundation: ch 70 or desired length. 70 ch = 39" for my tension
  • Row 1: dc into the "hump" of the 2nd ch from the hook and all the way to the end of the chain. Twist chain slightly forward to find the "hump" in the back side of the chains.
  • Row 2: ch2 (does not count as a dc). 1 dc into the back loop of the same st, 1 dc into back loops only into every st all the way across. 
  • Repeat row 2 until desired width is achieved. I used up 2.5 skeins of the LB Hometown USA yarn & crocheted a total of 11 rows of double crochets.
  • Position your Scarf the with right end of scarf on top of the left end. Place the buttons where you want it but you will attach the buttons to the bottom (left side) piece (see photo). You can always do the opposite with left side over right, whatever your preference is.

  • Sew the buttons on using a yarn needle and the same color yarn. I used a yarn needle that fit through the button holes with a large enough eye to accommodated the super bulky yarn. The double crochet stitches are large enough to slip the buttons right through.


For other Handmade by Phanessa patterns, visit my shops:

Etsy         Ravelry          Craftsy        Knit Picks

You may sell products using ©Handmade by Phanessa Patterns, but please give credit and link back to the patterns. Do NOT use any of my photos or copy/distribute any of my patterns as your own. If you share my free patterns, please link back to original pattern page. Please send me a message if there are errors to any of my patterns to handmadebyphanessa@gmail.com. Thank you!

© 2017 Handmade by Phanessa, All rights reserved. 

Monday, December 26, 2016

Crochet iPad Mini Sleeve


The craziness of Christmas is over. Well, not really sine there's still wrapping paper and toys everywhere. My husband had to run errands and I'm finally sitting down with ice on my back. I suppose my lower back pain is now "chronic". I avoided the "c" word for awhile. It's so hard some days to live normally and take care of my 3 little boys without aggravating it. :(

Anyway, my husband bought me an iPad Mini 2 for Christmas and I wanted to buy a case right away but I've had my eye on a larger iPad and he says to just test it out and if I don't like the size, we'll switch it for the larger one. yay! So, for now, I decided to crochet a sleeve. 


This crochet sleeve uses super bulky yarn so it works up very quickly. I wanted extra padding so bigger yarn was the better choice. I started right before we left for dinner at my in law's house. I crocheted on the way there and finished up at the house. It took just over 30 minutes! Those are my favorite projects! Quick and fast!


It's a pretty simple sleeve. The sleeve uses single crochets and is worked in the round so there's no need to sew anything together (my other favorite thing!) I like mine snug so I crocheted it just large enough to fit the iPad Mini. I added a button and loop from the other side to secure the top.


SUPPLIES:

Super Bulky Yarn - I used Red Heart Mixology in Retro Print (I think these are discontinued)
N/9mm Crochet Hook
Tapestry Needle
Scissors

Abbreviations:

ch - Chain
sl st - Slip Stitch
St(s) - Stitch(es)
sc - Single Crochet

PATTERN:

1) ch12 or as long as you need to get desired width. I chained just slightly longer than the width of the iPad Mini (see photo below). 
2) sc into the 2nd ch from the hook and all the way down (see photo below). 2 sc into the last st.
3) Working on the other side, sc back around (on the opposite side). 2sc on the last st (24 sts).


You will now work in a continuous round. 


1sc into the first sc (see photo above) and continue 1sc in each st around (and around) until you reach the desired height. I stopped at 8.25". I basically measured by sliding the iPad Mini in and stopped when I was happy with the size. I didn't use a stitch marker because I decided I was just going to stop on the side of the sleeve when I was happy with the height. 

End on the side doing 2 sl st(s) in the last 2 st(s) on the side of the sleeve. Meaning, not front or back of the sleeve where it's more visible.

Button and Loop

I positioned my button where I want it and sewed it on.
On the opposite side, pick the middle st. For me it was 11 sts across so I started my loop on st 5. Attach yarn here and and ch as many chains as you need to go around the button and back around to the st you attached your yarn. sl st to the same st you started on. Fasten off and weave in ends.

For me it was 10 chains but I can't stress enough that you have to measure this on your own since it depends on your tension and where you attached your button.


Tuesday, December 20, 2016

Crochet Lily Slouch Hat


This post is waaaaay overdue. The holidays have been crazy! Anyone else feel like crawling in a hole and hibernating until next year?

I recently opened an etsy shop (Handmade by Phanessa) and shortly after, decided to put my patterns out there. The feedback and support I received was so overwhelming that I really dove into it! I'm having so much fund design crochet and knitwear!

The Crochet Lily Beanie was one of my first few designs I released. I love this pretty design that I made a pair of fingerless gloves and boot cuffs to match! Visit my shops for the pattern!

Etsy: Handmade by Phanessa
Ravelry: Designs by Phanessa
Craftsy: Designs by Phanessa

Shortly after, I received yarn from Wool and the Gang and of course, I wanted to make the Lily Beanie. I absolutely love the Wool me Tender yarn they gave me. The Blue Lagoon color is absolutely gorgeous! I've never worked with 100% wool yarn prior to receiving their yarn. I also received their size K crochet hook. Love! Love! Love it all!


I definitely will be purchasing more yarn from them.
Click here to sign up for their newsletter: Wool and The Gang Newsletter


Thursday, December 15, 2016

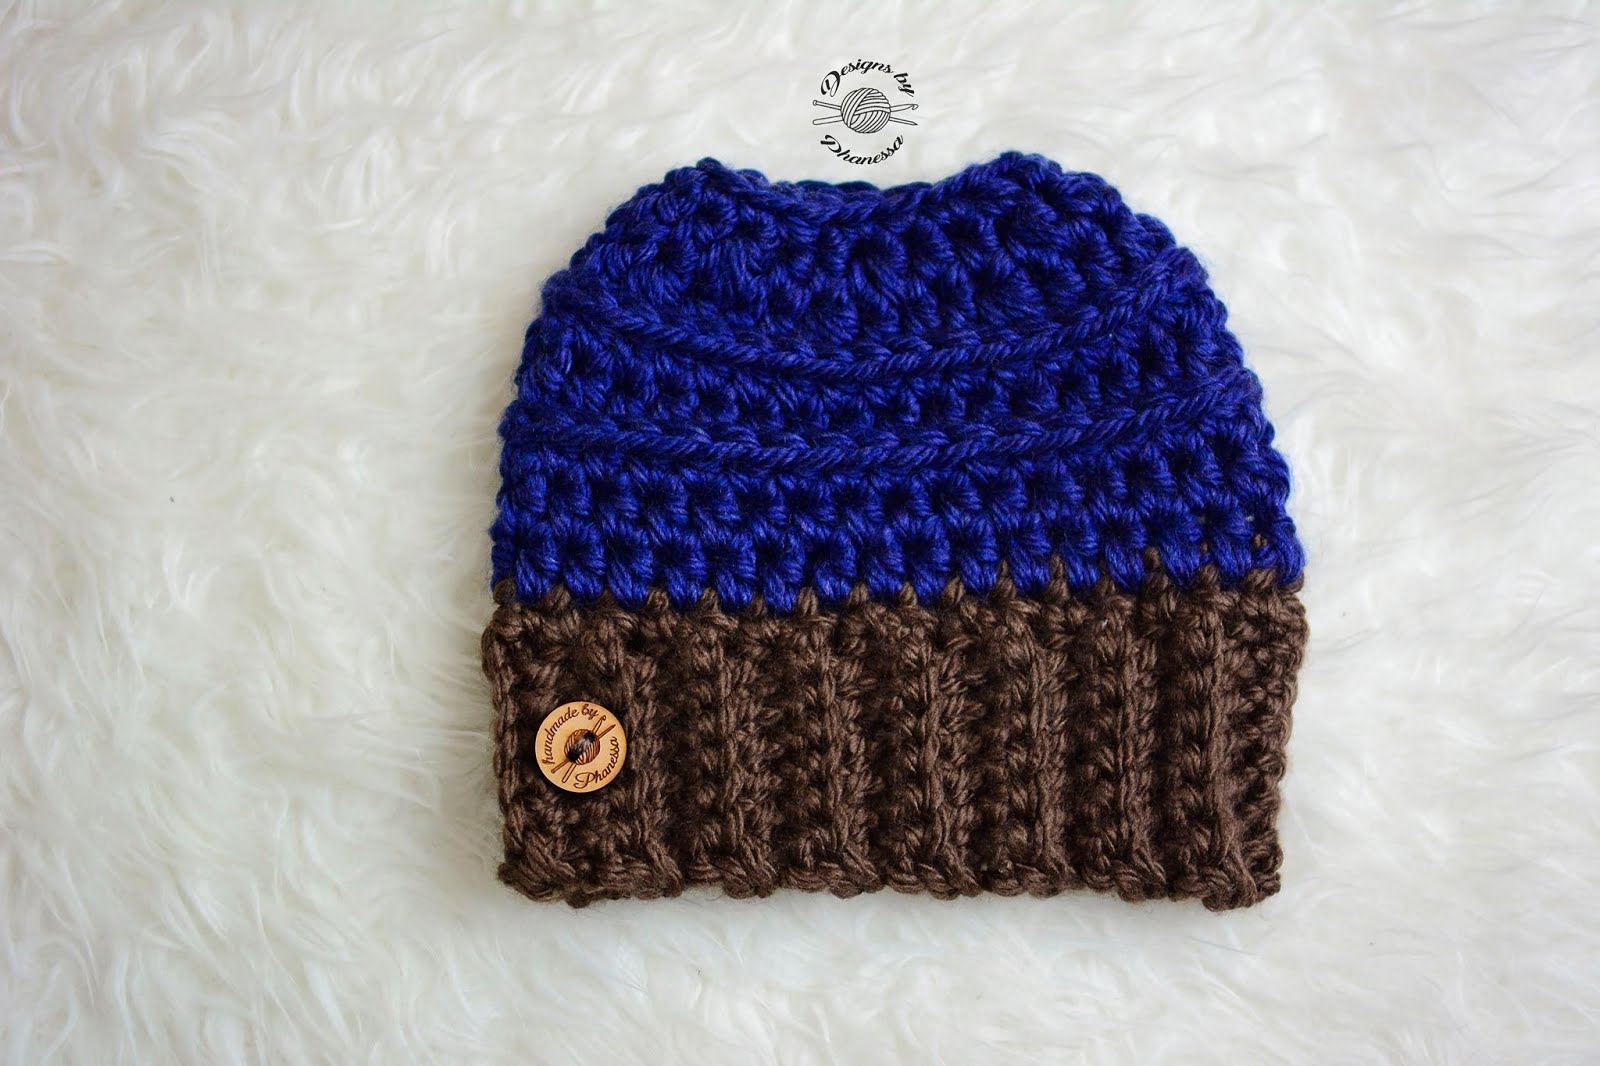
Chunky Chelle Ponytail/Messy Bun Hat


I've been cranking out gifts (last minute)! I can't believe Christmas just crept up on me! One of the ladies I'm making a hat for never puts her hair down. Okay, I saw it down ONCE. lol I figured this ponytail messy/bun hat would be perfect!

Worked with super bulky yarn, it's a quick project. I used 2 different colors but you can easily just use one color. Mainly, I was trying to use bits of yarn up since it was piling up!

This Beanie measures 23-24" circumference & fits an average adult. I have a small head but I made this one slightly larger to fit the person I'm giving it to.

SUPPLIES

Super Bulky Yarn - Lion Brand Hometown USA (or any Super Bulky)
9mm Crochet Hook
Tapestry Needle
Tape Measure
Scissors

Abbreviations:

ch - Chain
sl st - Slip Stitch
st(s) - Stitch(es)
sc - Single Crochet
BLO - Back Loop Only
hdc - Half Double Crochet
hdc2tog - Half Double Crochet 2 together
sc2tog - Single Crochet 2 together

Special Stitches:
hdc2tog - Half Double Crochet 2 together - Yarn over, insert hook into stitch, pull up a loop, yarn over, insert hook into next stitch, pull up a loop, yarn over and pull through all 5 loops on hook.

sc2tog - Single Crochet 2 together - Insert hook into stitch, pull up a loop, insert hook into next stitch, pull up a loop, yarn over and pull through all 3 loops on hook.

Pattern notes: The chain 1 at the beginning of each round does not count as a stitch. You will always start your first stitch in the same stitch as the ch1. You can skip the "knit stitch" on rounds 4 & 7 and just do a regular hdc if you want.


PATTERN

BRIM

With desired color for brim, start with a slip knot. ch 8 or as tall as you'd like your brim. sc into the 2nd stitch from the hook and in each st all the way across. (7 sts)

Row 1: ch1, sc into the BLO across (7 sts) 

Handmade by Phanessa: How to Crochet into the Back Loops Only (BLO) 
Please do a single crochet (even though the video does hdc) It's for demonstration purposes only.

Repeat Row 1 for a total of 32 rows (or until it measures the desired length of brim when stretched) For my tension, 32 rows is 23-24" 

SEAMING the Brim. With short ends of the brim held together, sl st the two ends together. Flip inside out so seam is on inside.

Handmade by Phanessa: How to seam the band

HAT

Round 1: ch1, sc into each st all the way around brim. sl st to the top of first sc.

Note: You should have just about the same number of single crochets as the number of rows for your brim (give or take 1-2 sts). My brim was 32 rows, I ended up with 33 sts around the brim. 

Round 2-3 (switch colors now): ch1, 1 hdc into each st all the way around, sl to the top of the first hdc

Round 4: Working in the back of the 3rd loop in each st, ch1, hdc into in each st all the way around (knit stitch). sl st to the top of first hdc.

Here's an awesome video from Moogly: How to Crochet HDC into the third loop

Round 5-6: ch1, hdc into each st all the way around. sl st to the top of first hdc.
Round 7: Working in the back of the 3rd loop in each st, ch1 *1 hdc in the next 3 sts, 1 hdc2tog in the next 2 sts (decrease), Repeat from * all the way around (knit stitch). sl st to the top of first hdc.

Round 8: ch1, *1 hdc in the next 2 sts, 1 hdc2tog in the next 2 sts (decrease), Repeat from * all the way around (knit stitch). sl st to the top of first hdc.

Round 9: ch1, 1 sc in the next 3 sts, sc2tog (decrease), Repeat from * all the way around. 

Note: If you like your hole larger, Skip Round 8 & 9 OR just 9. Play with it....

Fasten off and weave in all ends.


Tuesday, December 13, 2016

Crochet Chunky Gwen Headband


One of my co-workers will be retiring at the end of the month. I'm so happy for her (even though I wonder if I'll ever get there!). She loves working in the garden and so my boss has put together a garden theme gift basket for her. I was asked to make a headband with flowers on it. Since I didn't have too much time (and it's the crazy holidays), I whipped up something with some super bulky yarn and a giant flower!

If you'd like to add the flower, I used someone else's pattern but using a 9mm hook and super bulky yarn and only did 2 layers of petals. Go bigger if you'd like! You can get the pattern here: Mary Jane's Mary Jane


The Headband (ear warmer) is 3.5" tall and the circumference is 21-23"

Supplies

Super Bulky Yarn (1/2 skein) - I used Lion Brand, Wool Ease, Thick and Quick in Barley
US N/9mm Crochet Hook
Yarn Needle with large eye
Scissors
Tape Measure

Abbreviations

ch - Chain
sl st - Slip Stitch
sc - Singe Crochet
dc - Double Crochet
st(s) - Stitch(es)

Instructions

Ch 36 - or any even number of chains. I used my own head to measure and ended with 36 chains. Sl st to the first chain, careful not to twist your stitches.

Round 1: Ch1, 1sc & 1dc into the same stitch (it is important that you do this in the same stitch as the ch1). *skip a st, 1sc & 1dc into the next. Repeat from * all the way around, sl st to the top of the first sc st.

Round 2: Ch1 & TURN YOUR WORK (I'm not yelling, it's that important! lol), 1sc & 1dc into the same stitch *skip a st, 1sc & 1dc into the next. Repeat from * all the way around, sl st to the top of the first sc st.

Note: When you skip a stitch, you're skipping the previous DOUBLE CROCHET and you are doing your crochets into the SINGLE CROCHET stitches from the previous round. The space/hole in the single crochet stitch from below will be larger (like a hole) than the double crochet stitches (which has a longer stitch).

Repeat round 2 for a total of 6 rounds or as tall as you'd like. 
Fasten off and weave in all ends. 
Thant's it!


Friday, December 9, 2016

Crochet Chunky Cowl with Pom Pom


I made this Chunky Cowl 2 years ago and I wore it a lot then. Somehow it got lost in my craft room! I started cleaning the room to make some space for my sewing machine (which I had to put away because my yarn was taking over!)

This is one of the first few patterns I designed so it's not difficult for a beginner. It uses half double crochet stitches worked back and forth (instead of the round). 

For this cowl, I used 2 strands of worsted weight yarn however you can use 1 strand super bulky yarn.


Crochet Chunky Cowl
Child (Adult) Size (easily adaptable for child size)
Measurements (approx): 19 (29) Inches Circumference |  7.5 (10.5) Inches Tall

Materials:

2 Strands of Worsted Weight Yarn (I used Red Heart in GOLD) or 1 strand of Super Bulky yarn
9mm Crochet Hook
Scissors
Yarn Needle
Tape Measure 
Pom Pom Maker

Abbreviations:

sl st - slip stitch
ch - chain
st(s) - stitch/stitches
hdc - single crochet
fpdc - front post double crochet
bpdc - back post double crochet

Pattern Instructions:

With 2 strands of worsted weight yarn OR 1 strand of super bulky yarn:

Starting with a slip knot
ch 46 (60) or any even number of chains as you'd like until you reach desired circumference measurement. Join with a sl st to the beginning ch, careful not to twist your work.

ch1 (does not count as hdc)

Round 1-10 (14): hdc into the same st, hdc into each st all the way around. sl st to the beginning ch1, ch1 & turn your work.

Round 11-12 (15-16) : ch2  (does not count as a double crochet), bpdc into the same post as the ch2, *fpdc into the post of the next post, bpdc into the back of the next post, Repeat from * all the way around ending with a fpdc. Sl st into the top of the first bpdc.

Fasten off and weave in ends.

Cord & Pom Pom

Chain a long piece that is approx. 5-7" longer than the circumference of your cowl (or longer if you like). My adult cowl is 29", so I made a cord by chaining until my piece measured 36" (29" + 7" = 36"). Be sure to leave a tail when you start the slip knot and when you cut off the other end to tie to the pom pom. 

Using a yarn needle, weave the cord through the 11th (15th) (middle of ribbing edges) round of the cowl. Make sure the seam is in the back. I used a contrasting color cord to show you where it should go in the below photo (iPhone photo makes it look brighter yellow).


Using a large (or whatever size you prefer) pom pom maker, make 2 pom poms and use the tail ends of the cord to tie it. For the child size, I used a smaller pom maker and super bulky yarn. It's really your preference!


Crochet Lulu Pom Pom Scarf

Let's face it. Kids things are cute. They're miniature and the kiddos look good modeling anything! Anyone who knows me knows ...