Monday, July 14, 2014

Crochet Lanyard


Some days I wear outfits that I just can't clip my work badge to. Maternity clothes with all the stretchy bands and fake pockets, really gives me no option to clip the darn thing to LoL

I have a work lanyard I would use if I needed one but it's not pretty :) and who doesn't like pretty things?

I've been looking for smaller crochet projects and I figured a lanyard would be easy and not so time consuming.

I salvaged the lanyard clip from an old lanyard in our junk drawer.


I'm not as happy with the results because the little flowers will twist. Next time I make it, I'll crochet the lanyard and attach flowers instead of using the flowers as part of the lanyard length.

I followed the tutorial for the Crochet Romanian Point Lace Wide Cord here. And the Floral Cord Lace tutorial here. Both tutorials are from the same person. She's fast so if you're slow like me, pay attention (or pause) lol
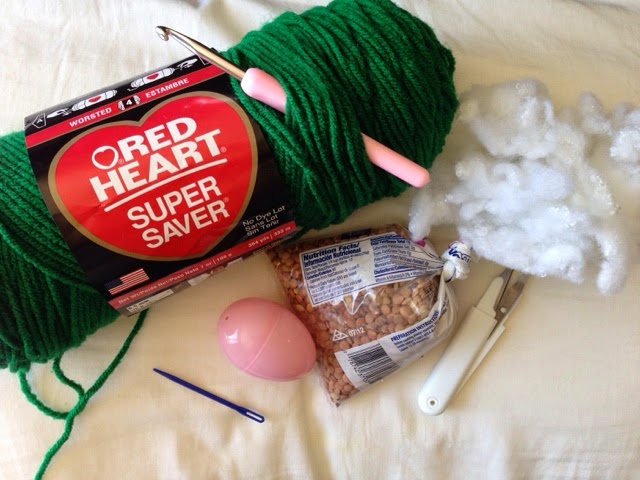
MATERIALS USED:

Yarn (I used cotton)
Crochet Hook (Size 5mm)
Scissors
Lanyard Clip


Here's what it looks like with just a head wearing it HAHA
I will diffidently be making more of these!


Friday, July 11, 2014

Crochet Round ball


My 17 month old loves to throw things so I've been trying to think of soft things to give him. Of course my 4 year old hears me talking about a crochet ball and he said "I want a green one please!" 

I came across this free pattern for a crochet sphere ball on Ravelry. I added an Easter egg with beans and it's a rattling ball! Fun! I can't remember where I read the suggestion (Pinterest maybe?).

I'm trying my best to get used to written patterns. Up until this point, I have always watched YouTube tutorials because it's easier for me to follow along. Lately, I'm challenging myself to read patterns! Here goes!


SUPPLIES:

Yarn (I used Red Heart 4 ply worsted yarn in Paddy Green)
Crochet Hook (I used 5.5mm)
Yarn Needle
Scissors
Batting (used batting from pillow $1.99 at Ikea!)
Plastic Easter Egg
Beans (I had Lentils on hand)


DIRECTIONS:  Follow the pattern here.

When you are decreasing, make sure you fill the egg and insert it before your hole gets too small.


Fill batting around the egg.


Continue to decrease to close the ball. Before you completely close it, add more batting.


It was a fun little project but now that I'm done, I wish I had glued the egg shut! If you squeeze it too hard, you can hear it pop open. I haven't had any lentil beans fall out yet. As long as I squeeze it in the other direction, it shuts closed. It's in there pretty snugly.


Thursday, July 10, 2014

Crochet Face scrubbies

I don't wear a lot of makeup (foundation) but when I do, I feel like I can't remove the makeup! These cotton scrubbies are perfect for washing my face. Just throw it in the laundry and reuse! I'm assuming the little monster in the washing machine or dryer will eventually steal it as they have been with our socks. So it's a good idea to make extra! haha

These are pretty simple to make. 
It's just like starting any hat pattern.
You use very little yarn.
You need to know how to do a slip knots, chain stitches, 
single crochets (SC), & double crochets (DC).
You can start with a magic circle or a chain stitch.
You can make these for yourself or gifts for your girlfriends.
Make it slightly bigger, & it's a coaster! haha

SUPPLIES:

Cotton Yarn (I used Peaches & Creme)
Crochet Hook (5mm)
Scissors
Yarn Needle


DIRECTIONS:

Starting with a slip knot:
Create what looks like a pretzel (1)
Pull yarn up with hook (2)
Pull ends to tighten but not too tight! (3)
Yarn over (4)
Pull through loop (5)
Chain 5 (6)


Slip stitch to join into the first stitch

Put hook through loop (1)
Yarn over and pull through loop (2)
Completed slip stitch (3)


Row 1: 8 single crochets (sc):
Place hook in the middle of loop (1)
Yarn over & pull the yarn through hook (2)
You will have 2 loops on the hook (2)
Yarn over again (2)
Pull through both loops (3)
Slip stitch at the end to join (4)


Row 2: 16 double crochets (dc):
Chain 2
Yarn over & go through the 1st stitch (1)
Yarn over & pull through
You will now have 3 loops on hook (2)
Yarn over pull through 2 loops only (2 - 3)
Yarn over and pull through remaining 2 loops (3)
Repeat another dc in the same stitch
You will have 2 dc in each stitch for a total of 16 stitches (4)
Slip stitch at the end to join (5)


Row 3: 24 double crochets (dc)
Chain 2
1 dc in the first stitch
2 dc in the next stitch
1 in the next stitch
2 in the next stitch...
You repeat this all the way around for a total of 24 stitches
Slip stitch at the end to join


Cut off yarn and pull tail through.
Using Yarn needle, sew both ends into the scrubbies.


Now make another!


Crochet Newborn Basket Prop using Fabric

There's an awesome tutorial here for a DIY crochet basket. If you're a beginner, I recommend you go to that tutorial :) It even has instructions to make the fabric yarn out of fabric. I already made my own fabric yarn. See the tutorial here!

My base for the basket is about 13 inches. It's a little bigger than the linked tutorial. The purpose of my basket is to use it as a newborn prop so I need it a little larger.


I used about a king size flat sheet ($3 at Goodwill!) to make the Fabric yarn. The crochet hook I used was a 15.75 mm. I didn't have anything between 12-15mm. I went bigger. 


You start with a magic circle and crochet 8 single crochet stitches


Working in a continuous round (a marker would be helpful):

2 single crochets (increase) in each stitch. Remember to go through 2 loops. You'll end up with 16 stitches.


Next, single crochet in the first stitch and 2 single crochets (increase) in the next stitch. Repeat this all the way around. I use the tail to mark the beginning of the next round (like the photo below). I move it up after each round.


Next, single crochets in the next 2 stitches and 2 single crochets (increase) in the next stitch (1, 1, 2...) & repeat all the way around. 


Each round you will add another single crochet stitch before an increase stitch.

1, 1, 1, 2 
1, 1, 1, 1, 2
1, 1, 1, 1, 1, 2

Stop when you have reached the desired width. Again, mine was 13 inches.

Because it's already imperfect and chunky, adding more fabric was no biggie. I just double knotted and continued.


Once I got my desired width, I started single crochet stitches through front loop only. This is different from the linked tutorial that goes through both loops. It's a personal choice. 


After this round of one loop only, you will do one single Crochet through both loops until you reach your desired height. 


I purchased the other 2 baskets from Ross for about $8. Pretty good deal :) but something about making your own makes it better and for $3!


And here is my son who surprised us by arriving 6 weeks early but he did so well in the NICU, he came home in one week!


Monday, July 7, 2014

Crocheted Olaf

My son recently fell in love with the Disney movie, Frozen (I hear most kids are!). He got the movie for his 4th birthday & I think (almost) everyone can agree that Olaf is the funny character in the movie. So of course, everyone is selling the pattern to make Olaf on Etsy.  

Let me tell you a secret... I hate reading patterns! Okay, it's no secret. I just can't follow along. I'm a visual learner. It's how I learned to crochet. I watch YouTube videos!

I couldn't find any videos on YouTube so I decided to just wing it. And I'm pretty excited about the results! I would make his head a little different next time but I thought it was great for my first try especially since I don't crochet toys. Most of my crochet projects are related to photography props. 

PATTERNS: If you're still interested, I found a free pattern here and this tutorial (I think that's what it was) is beautiful however it wasn't in English! :( Good luck!

It's pretty easy if you know your basic stitches, how to increase, decrease and attach parts...

Let me tell you the story of why I decided to make one.

We were shopping for food for the 4th of July BBQ earlier in the day. As soon as I walked into the supermarket, there was a big claw machine thing with nothing but plush Olaf toys. Naturally it drew my attention. I love to play with those claw machines. It's an addiction you can almost compare to gambling (haha maybe not). 

My 4 year old son gets excited because he knows that the prize will drop into the space where he will be waiting to open. I really didn't think about how upset he would be if I didn't get a prize.... drum roll please....... I didn't get the prize. *gasps*

He was so sad and whined about it the whole shopping trip. What does mommy do? She crochets him one! The twigs (on head and arms) are actually brown but the photo looks black.


 I had Logan close his eyes and I put Olaf in front of him with my camera ready. I said , "Open!"


Glad he liked it!


Friday, July 4, 2014

Newborn Photography Props

I have been dreading doing little newborn pants because I thought it would be too difficult to learn. I followed this tutorial and found that it wasn't as hard as I thought.

After using worsted weight yarn (Red Heart) I wanted to make the soft thin ones I've seen around. I had no idea what type of yarn it was but after some research, I found out it was mohair yarn. I went searching for Mohair yarn in my local craft stores. I went to 4 different stores including JoAnns & Michaels and they didn't carry it. I was so sad because I just have to start making it now. I found them on eBay for pretty cheap. A ball of yarn is about $3!!! This is an AMAZING price given that I finally found it in a small local yarn shop for $15 (same exact one). Yes, I bought it because like I said, I just had to start crocheting!

Of course the knitted pant/hat sets look much nicer however I'm not that great at knitting.

Since i'm having a boy, I've made sets for little boy newborns. For when I get a newborn baby girl in the studio, I made some tieback headbands too! They're so much fun to make. I would probably go all out making girl accessories if I were having a girl... My hope for ever having a girl is out the door :(

Crochet Hat & Pant Mohair Newborn set in Turquoise:

Crochet Newborn Leg warmers and Bonnet set in Mint Green: 

Crochet Newborn Pant and Bonnet set in Grey & Cream: 

Crochet Newborn Pant and Newsboy Hat set in Green (multi-color): 

Crochet Newborn Mohair Flower with a Pearl Tieback in Turquoise: 

Newborn Beaded Tieback in Cream with Blue Beads: 

Newborn Beaded Tieback in Turquoise with Clear Beads: 

Isn't she the cutest 10 week old you've ever seen!?! 


Crochet Lulu Pom Pom Scarf

Let's face it. Kids things are cute. They're miniature and the kiddos look good modeling anything! Anyone who knows me knows ...