Tuesday, May 19, 2015

Simple Crochet Newborn Hats

I can't believe it was just 2 years ago that I started crocheting. It seems each time I find something I enjoy, I dive deep into it. ^_^ I started off with such large hooks (9mm+) and chunky yarn because it was easier to manage and the projects were so fast! Most of my projects now are made using hook sizes 4.5 - 6mm. 

I wish I had more time to take on bigger projects. I'd love to start making clothing!

One of the easiest things to make are little newborn hats. Double crochet stitches make for faster projects because the stitches are taller and you finish a lot quicker than if you were to do single crochet stitches. 

I started all my rounds chaining and joining to beginning chain to form a loop/circle. I was always intimidated to do the magic ring. Once I learned the magic ring, I never went back. What was I so afraid of? It's much easier (for me)!

There's so many great FREE tutorials out there!

This is probably the most simple hat. 9 rows of double crochets and finished with 2 rows of single crochetes. A cute button finishes it off. Simple. Cute.

This hat was done the same way except for the change of color and the shell stitch edges. Add a flower and it's an adorable baby girl hat.


Crochet Newborn Bonnets

I went a little crazy making these cute little bonnets at work. No, I wasn't crocheting while working. I'm still nursing my baby and I have to pump at work so I make the most of that time by crocheting. The good thing about newborn hats are they are little itty bitty and takes less time to make (especially now that i'm getting better!)

Free video tutorial for the bonnet found here. 
Free Three Layer Flower pattern & tutorial for the flower here. 

I even tried using mohair yarn which I absolutely LOVE! 


Burgundy Cross Stitch Slouch Hat


After making a green slouch hat that was slightly small, I decided to make another one using the cross stitch (because I didn't want to make the exact same hat again).

I used Red Heart Super Saver Yarn in Burgundy (I know my photos look red)

6mm Hook
Yarn Needle
Scissors

Abbreviations:
ch = Chain
sc = Single Crochet
dc = Double Crochet
sl st= Slip Stitch

Round 1 - 12 stitches
ch 2 (does not count as a chain stitch)
11 dc into the magic ring
sl st into the top of the ch 2

Round 2 - 24 stitches
ch 2 (does not count as a chain stitch)
2 dc into the same stitch 
2 dc into each stitch all the way around
sl st into the top of the ch 2

Round 3 - Repeat Round 2 = 48 stitches

Round 4 - 10 - cross stitches
ch 2* (this counts as a double crochet stitch)
skip next stitch & dc into the 2nd stitch
dc into the skipped stitch (these two stitches creates a cross "X")
Repeat all the way around
*when you get to the last stitch, dc into the stitch of the beginning chain 2  

Round 11 - 17
ch 1 and 1 sc in each stitch all the way around (do not sl st)
after the last stitch, place a stitch marker here
sc in the next stitch (beginning ch 1) & complete using a continuous round until you get the desired width
I like to sl the last couple of stitches to blend in better

Fasten off and weave ends in (don't forget to weave in the beginning tail from the magic ring.) It has this swirly look which I liked very much. yay!


I'm just learning how to read patterns and write them so I hope I didn't screw up too bad!


Green Crochet Slouch Hat

This slouch hat was made following this pattern. I used Red Heart Super Saver yarn and a 5.5 hook but it was a little tight for me. I followed it exactly. I guess my tension was too tight or my head is too big haha. It looks cut on my kids though!


Monday, May 4, 2015

Crochet Coffee Cozy


It's Teacher Appreciation Week! I thought about what to make for the boy's preschool teachers. I want to be fair so I want to give them all the same gift even though my 4 year old has a specific small group teacher. 

I decided to crochet a coffee cozy (Free tutorial by Jonna Ventura) and give them each a gift card from Starbucks. Everyone drinks coffee right? Especially when work means dealing with 38 preschoolers from ages 2-5! 

I love these cute little wood heart buttons I ordered a while ago. They were smaller than I had thought but were just perfect for this project.

Can you tell the filler is from Easter? :)


I found this free printable tag here! I thought the guy at starbucks would give me a larger cup but I'm not going to complain! I used teal cardstock because it matches the color of the coffee cup. Luckily I also had teal ribbons. I love the color teal... my bridesmaids' dresses were teal ♥


I love how simple this is and hopefully they love it as much as I do!


Monday, March 30, 2015

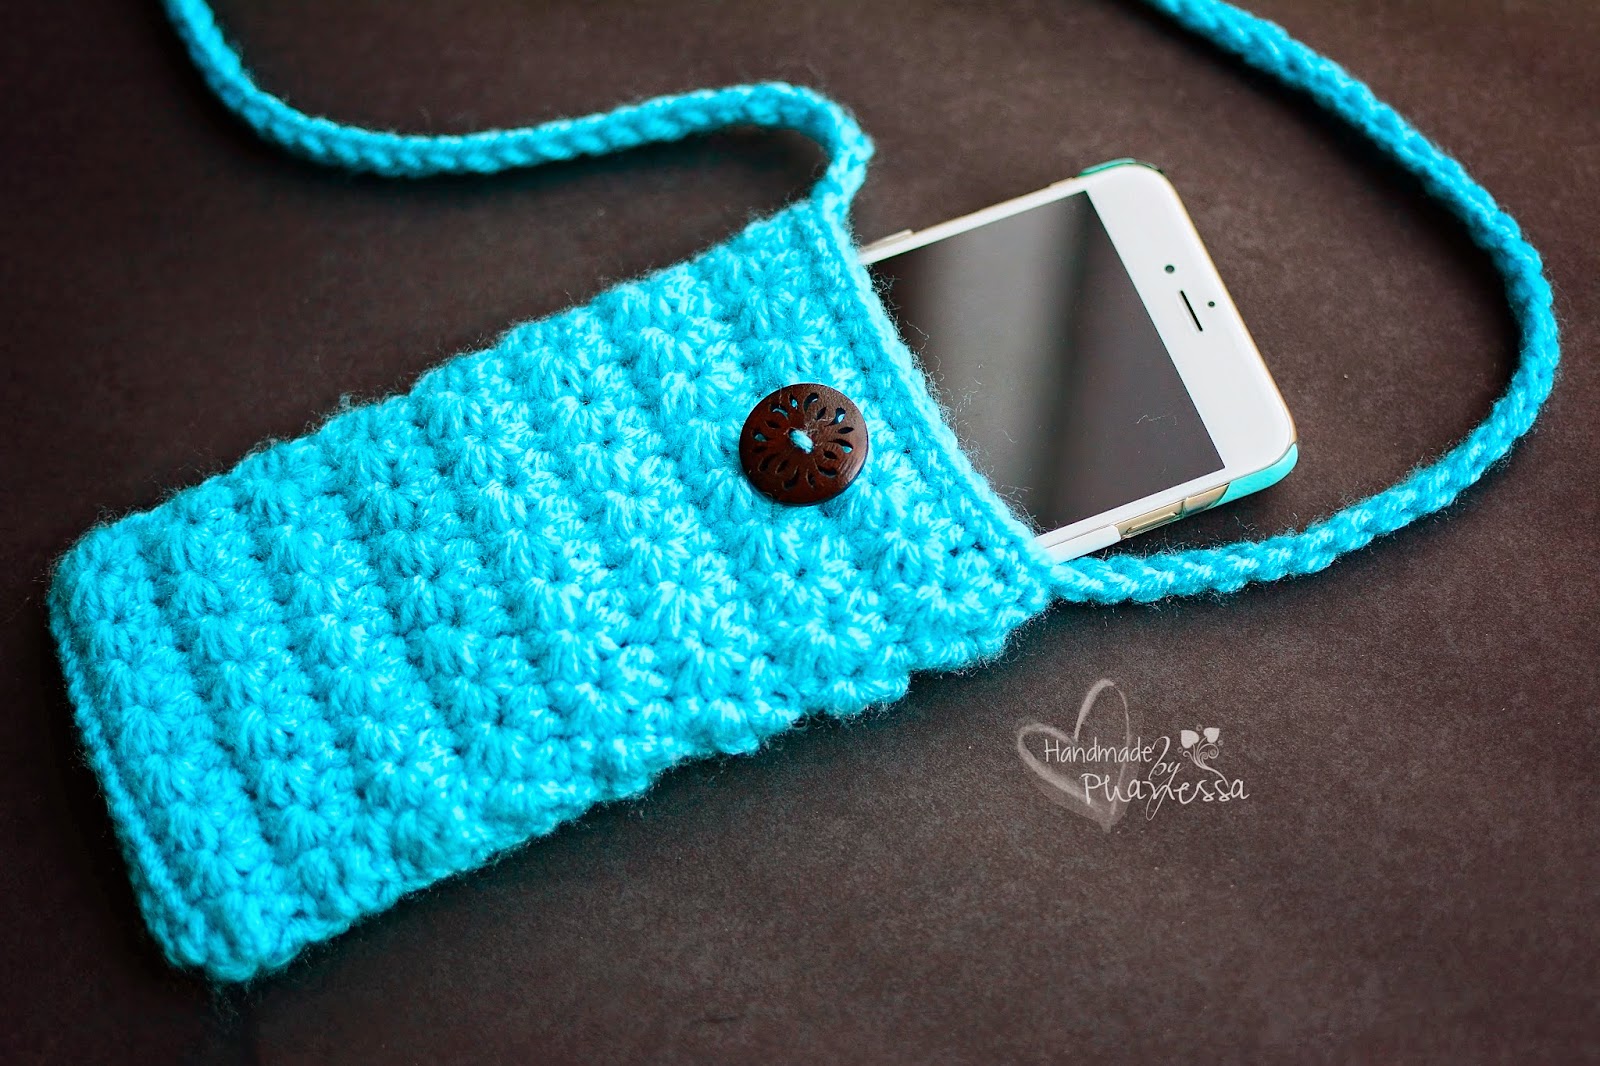
Crochet iPhone (6 Plus) Bag

Recently, I crocheted a bag that allows me to carry my iPhone at work. Sadly, I'm still wearing my "bigger" clothes because losing the baby fat this 3rd time seems to be an uphill climb! I was pretty excited about how it came out (The blue one was a gift).


Fast forward to St. Patrick's Day (darn that day!) I went to pump at work and didn't bring my handy little bag. Without thinking, I put it in my back pocket (which I never do!) and went to the ladies room.... do you see where I'm heading with this? I'll get to the point. My phone fell into the toilet. I didn't even realize what had happened when it happened. In the split second, I decided to grab it (ewe, ewe, ewe!) Wrapped it in paper towel and washed my hands (and arms) THREE times. Scrubbing HARD. I wasn't able to turn it off. The screen started doing funny things. I went back to my desk (still upset) and put it in a bag of rice. I notice the phone was HOT. Yes, I had uncooked rice at my desk. I have a rice sock in my drawers ^_^ I waited a long 6 days and it didn't work. 

I tried to use my iPhone 4 but it was so slow and didn't work well. I decided to upgrade and get an iPhone 6. It was so hard deciding between the 6 or 6 Plus. I heard good and bad about the plus because of the larger size and small female hands etc. I had just purchased an iPad (you bet I crocheted a case for that too!) so it was hard for me to have to spend the money to buy a new phone.

After going back and forth and still annoyingly doing so at the store, I went with the iPhone 6 Plus. I've had it for less than a week but I like it so far. My old bag was larger than my iPhone 5 but not big enough for the new phone. So, I decided to make a new one. 

I LOVE the star stitch. I practiced it before and it was so cute. I looked for a video tutorial on YouTube and found this tutorial. 

I only used the tutorial to get started. I didn't complete it as she did. I think hers was for an older iPhone so instead of chaining 15, I chained 17 (I think). I finished off with single crochets on top. I didn't make the flap. I like to be able to slip it in and out without having to deal with a flap. I added a little button to hold the little strap. 


I know I should get better protection when buying a case but I was never into the bulky ones. Isn't this chevron case so cute though? I didn't know parts of it was clear when I ordered it but it's cute.


Monday, March 23, 2015

Crochet Baby Sandals

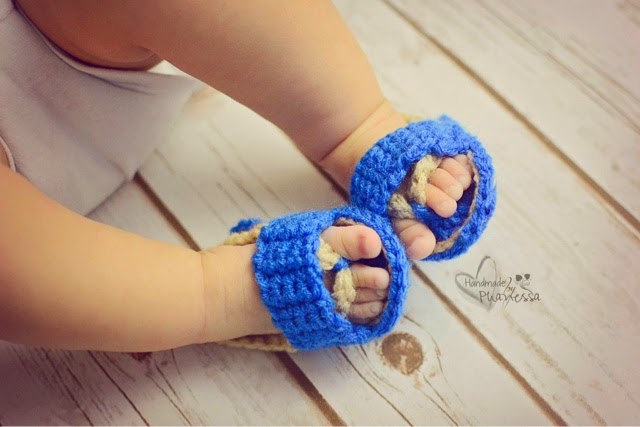
A month ago, my friend posted a picture of these adorable crochet sandals on my facebook. There's a free pattern so I made one in blue & cream since the original was grey and pink. I'm sure daddy will thank me when I'm not putting pink sandals on our baby boy! Ha!

The good thing about getting better at crocheting is that you can look at a photo and get an idea of how to make one.  If you know the basics, it's pretty hard to screw up (I still manage to screw up sometimes!). What I mean is it's easy to figure out the pattern if you know the basics. :) if you're interested in the pattern, you can find it here. If you're more of a visual person, she has a link to her video tutorial too.

Getting a photo of my son wearing the saddles was a challenge since he is nonstop kicking and flapping his arms. Haha. After many, many attempts (and getting kicked in the face) I gave up. Looking through the photos, I was able to use one of them. Yay!

I tried the sandals without the top blue straps but it didn't stay on so I added it and it was much better. I may double up on the soles next time to hold the shape better. I liked the soles I used for the Crochet Baby Flip Flops. I would probably make the back straps shorter too so it's more snug (1 or 2 less chains would be sufficient).


Crochet Baby Flip Flops

So I saw this really cute chubby crochet flip flop pattern and I wanted to make one! I love the idea of stitching two soles together. It creates the thick sole and it also holds its shape better. I was all excited because I'm getting better at reading patterns but for some reason, I wasn't getting the right number of stitches and I started to get really frustrated. I was determined to finish it so I just moved along and pretended like I knew what I was doing! Ha! It worked out anyway. 


Saturday, March 21, 2015

Crochet Teething Necklace


There's so many teething remedies out there and I feel like none of them has worked for my boys. Now that the 3rd baby is about to break his first set of teeth, I decided to try the teething necklace. I also made another wooden teether using scrap fabric. 

Since this will be in his mouth, I used cotton yarn.

Using a wooden ring, I created a slip knot and single crocheted around the ring and slip stitched to the beginning single crochet. 

I then single crochet around a smaller wooden ring.

Next, I chained as many chains as I needed to get the desired length of the "necklace".


I slip stitched back into the base of the larger ring.


Friday, March 13, 2015

Crochet Four Leaf Clover


I've been obsessed with crocheting things for my backdrop. I found a tutorial here for a 4 leaf clover. I made it using different hook sizes in 2 different colors.

Aren't they so cute?


Crochet Bow Tie


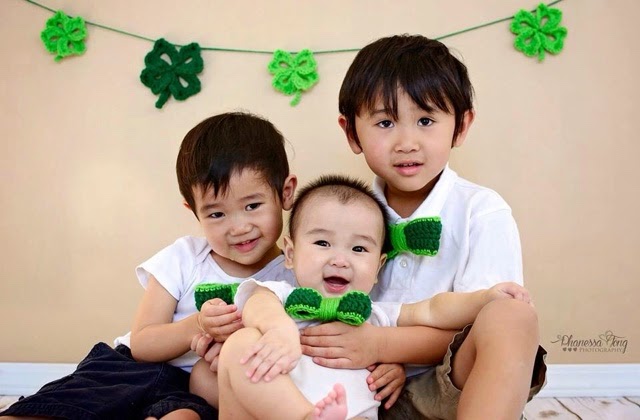
It's been so busy that I didn't have time to crochet matching hats for the boys for St, Patrick's Day photos. So I decided to make bow ties. I even got lazy and did not make the straps to go around their necks. I added a safety pin on the back to attach to their shirts. 


Materials
I used Red Heart Worsted Weight 

5 mm hook
Scissors
Tapestry needle
Safety pin

Stitches used
Double Crochet - dc
Single Crochet - sc
Chain - ch
Slip Stitch - sl

Round 1 - ch as long as you want  so that when you join, it's the length you want. sl into the first ch (careful not to twist chain)

Round 2 - ch 2, 1 dc in each stitch around (including the same ch where you ch 2). The ch 2 does not count as a dc stitch so the first one will look like there's 2 chains, sl into the top of the beginning ch 2 

Round 3 - ch 2, 1 dc in each stitch around (including the same ch where you ch 2). The ch 2 does not count as a dc stitch so the first one will look like there's 2 chains, sl into the top of the beginning ch 2 

Fasten Off. If you want your bow tie bigger (taller) Do more rounds.

Changing Colors. sc into each side and fasten off. Weave your yarn into your work.

Using the same color for the sc, wrap the middle squeezing it a little too. Tie at the back and add a safety pin. 

You may choose to add a strap to attach around the neck. Just chain the length you want it and do a half double crochet back into the 3rd stitch from the hook; continue all the way back to the beginning. Add a button to attach it.


Crochet Lulu Pom Pom Scarf

Let's face it. Kids things are cute. They're miniature and the kiddos look good modeling anything! Anyone who knows me knows ...